
Algebra tiles can be difficult to figure out at first. However, once you grasp the basic ideas, algebra tiles are a fantastic tool to help many students understand where algebra processes come from, how to perform them, and why algebra rules are the way they are.
The sides of algebra tiles are either 1 unit or a $x$ units long (some sets also include a $y$ length). Each algebra tile represents the area it covers. Use multiple algebra tiles together to represent polynomials, using the “flip side” or other color to represent negatives.
Individual tiles, as well as multiplying and factoring with algebra tiles, use the area model of multiplication. Combining tiles into algebraic expressions and polynomials, or gathering a group of tiles together, is addition. Subtraction with algebra tiles can be done by either taking away or adding the opposite. Finally, there may be times when you match up a tile and its opposite to create zero pairs, either to remove them from the calculations or to create the outcomes you need.
Read on to find out more about each of these basics, including practice exercises using the Polypad.org online algebra tiles. You can also watch the video I made about this topic.
This post contains affiliate links. If you purchase through these links, I may earn a small commission at no additional cost to you. You can read more about how I choose affiliates and products at my affiliate page.
Individual Tiles Represent the Area They Cover
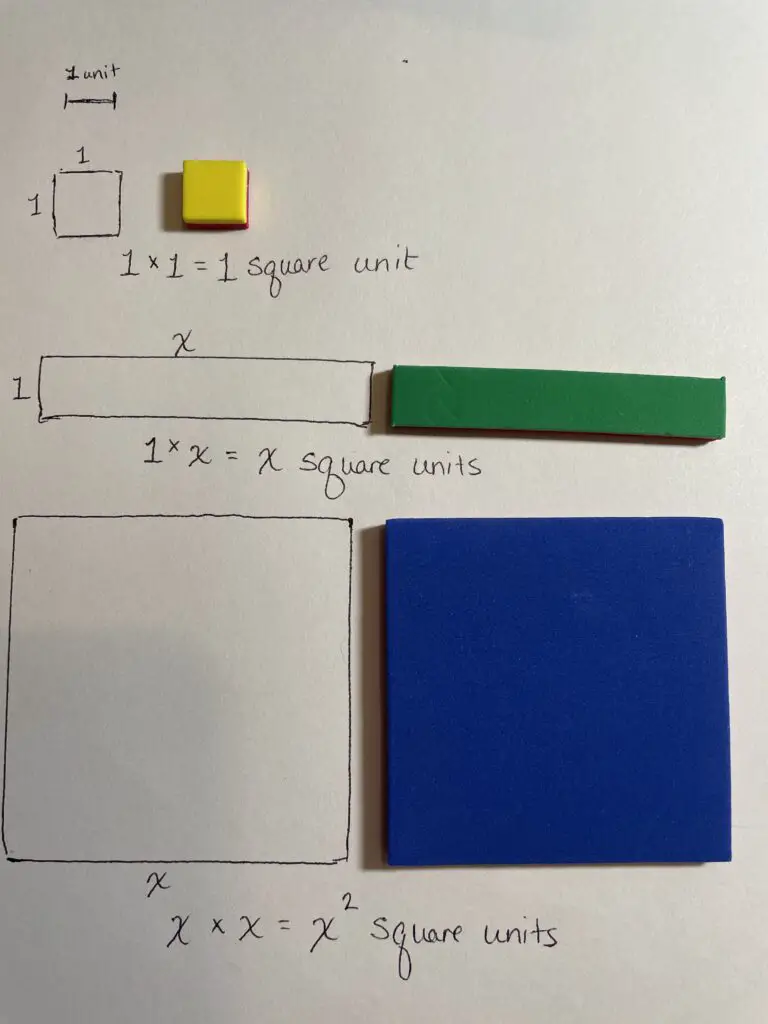
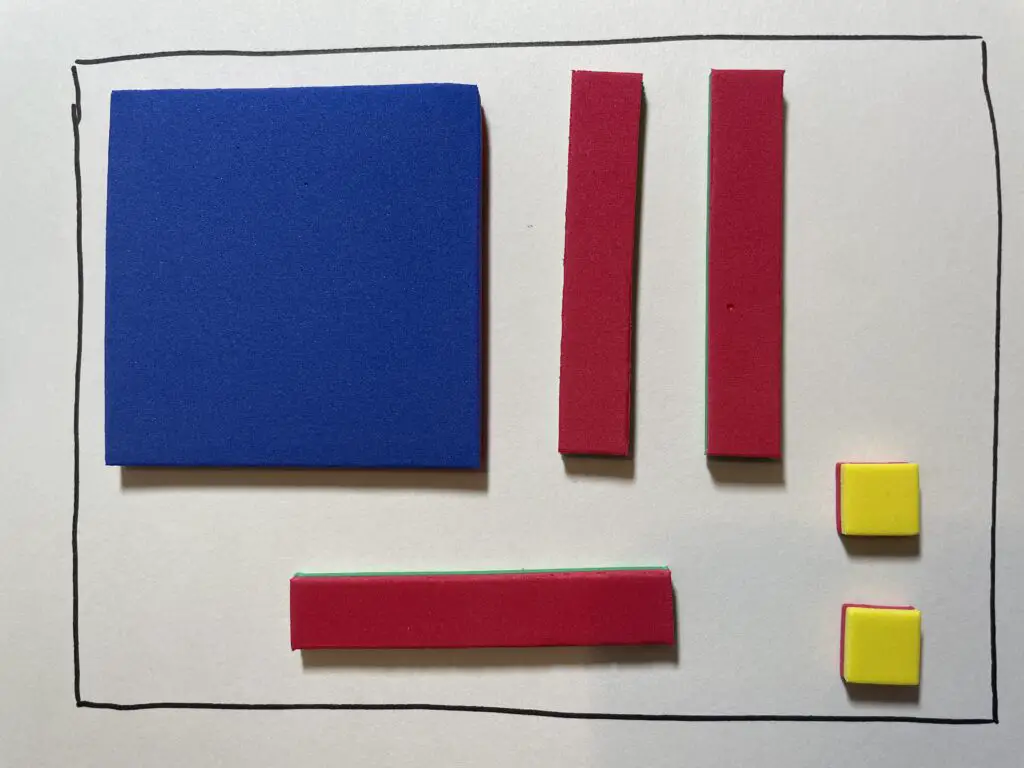
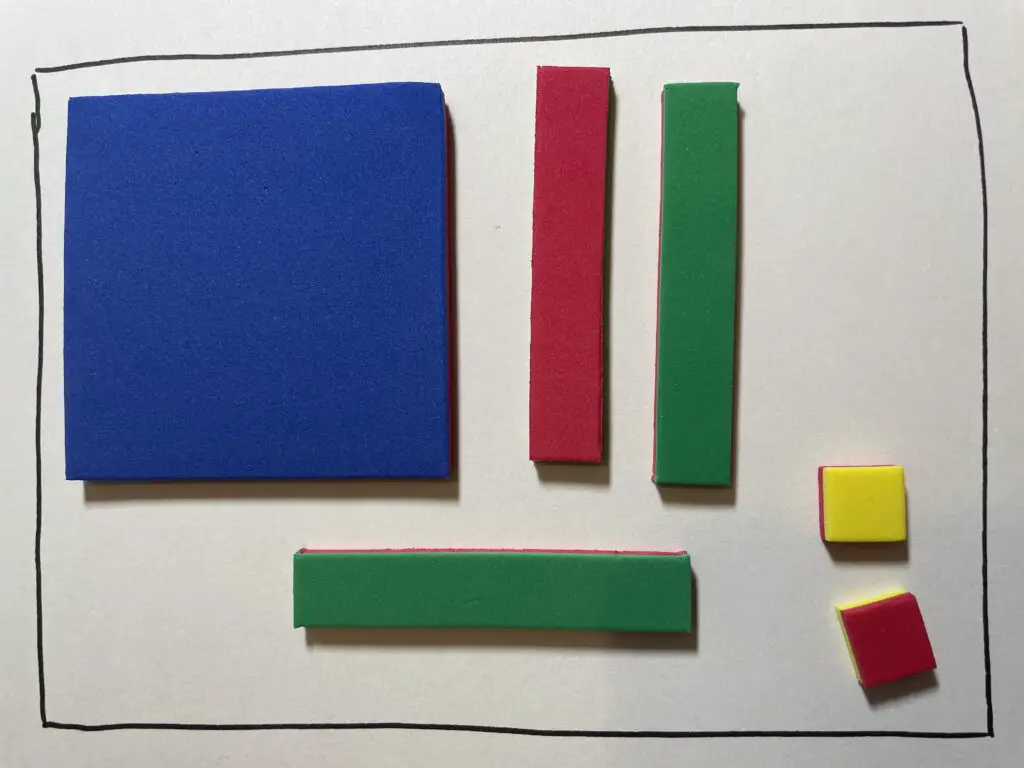
Your set of algebra tiles (affiliate link), whether electronic or physical, will have 3 to 6 different sized rectangles. The smallest will be a square and will set the standard “unit” for your tiles. We will call these small squares $1$ because they are one unit wide by one unit high, and 1 times 1 equals 1 square unit. You will also have at least one type of longish, thin rectangle. These will be called $x$ (or whatever your main variable is). They are the same height as your $1$ square — they are one unit high. However, you shouldn’t be able to measure their length exactly. In fact, fight any urge you might have to even estimate their length. Just roll with the idea that you don’t and can’t know their length. They are $x$ units long, and the area this rectangle covers is 1 times $x$, or $x$ square units. You will also have some larger squares whose height and length are both $x$ units. These are your $x^2$ tiles. You may or may not also have rectangles of a different length ($y$) and squares whose sides are that same $y$ length, as well as rectangles with one side length $x$ and the other side length $y$. Since each tile represents its area, and since area is a 2-dimensional measure (height and width), our algebra tiles will be limited to polynomials of degree 2 or less. We can explore basic algebra patterns with these tiles, but don’t forget to work with the patterns using math symbols as well. The tiles won’t be useful when we have $x^3$ or higher powers, but the symbols and patterns will still hold.
Add Up the Tiles to Create or Read Algebraic Expressions

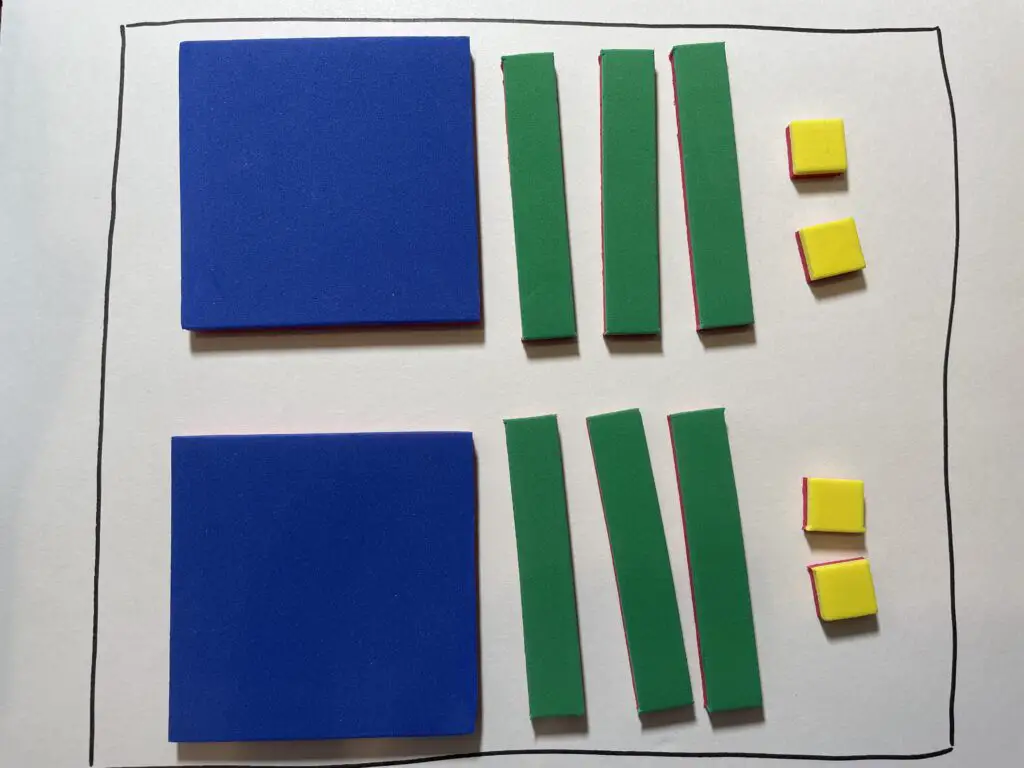
Collecting together, accumulating, or grouping a set of tiles is the equivalent of adding them. To find the polynomial represented by a group of algebra tiles, count up how many tiles of each size are in the group, use those counts as the coefficients and the tile type as the variable component of each term, and add the terms together. In reverse, if you are given a polynomial that you want to represent using algebra tiles, create a group of tiles representing the number of each tile type as specified in the given polynomial.
Use the Area Model of Multiplication or Grouping to Multiply and Factor
At their core, algebra tiles are a physical, manipulatable representation of the area model of multiplication. This is true by their very design, where each tile represents the area it covers. That easily extends to using that area model to represent multiplication when modeling with algebra tiles. Then, since factoring is essentially a process of unmultiplying, we can also use that area model to help us determine factors of polynomials whenever possible. (If you’re not familiar with the area model of multiplication, check out my video here.)
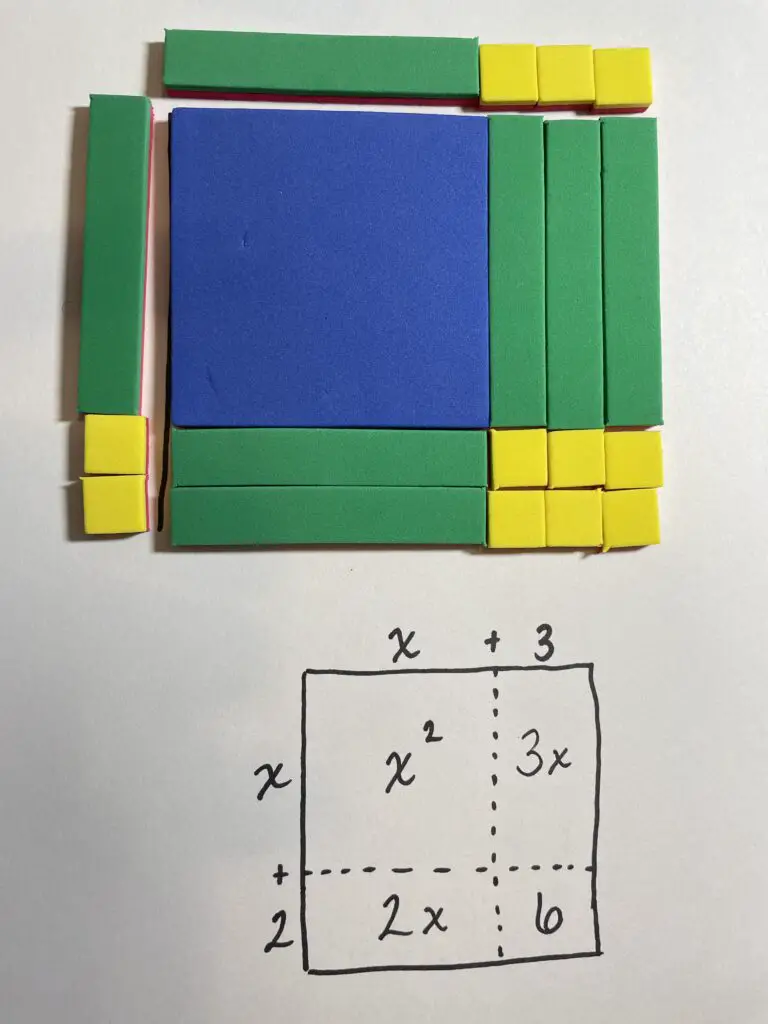
The area model of multiplication uses the area of rectangles. Sometimes we will be able to create a perfect rectangle using the tiles we have. When that is possible, the length of the sides of the rectangle are our factors. To multiply, we set up the factors as two sides of the rectangle, then fill in the rectangle with the tiles needed. To factor, we take the tiles that represent our polynomial, arrange them in a perfect rectangle, and “read” the length of each side of that rectangle.
Sometimes we can only create a perfect rectangle if we add in a few extra blocks using the idea of “adding zero” or pulling “zero pairs” into the workspace. We’ll talk about zero pairs in the next section, but we’ll save how to use them in factoring for a later time.
Other times, it is impossible to create a perfect rectangle out of the tiles we have, whether or not we pull in zero pairs. In this case, we look to see how many identical groups we might be able to make out of the tiles we have. If there is no way to split our tiles into more than one identical group, and there is no way to make that set of tiles into a rectangle, then the polynomial is prime. If we can split that polynomial into two (or more) identical groups, this represents “factoring out the GCF”. We would factor that polynomial into the number of identical groups times the “smaller” polynomial that is within each group.
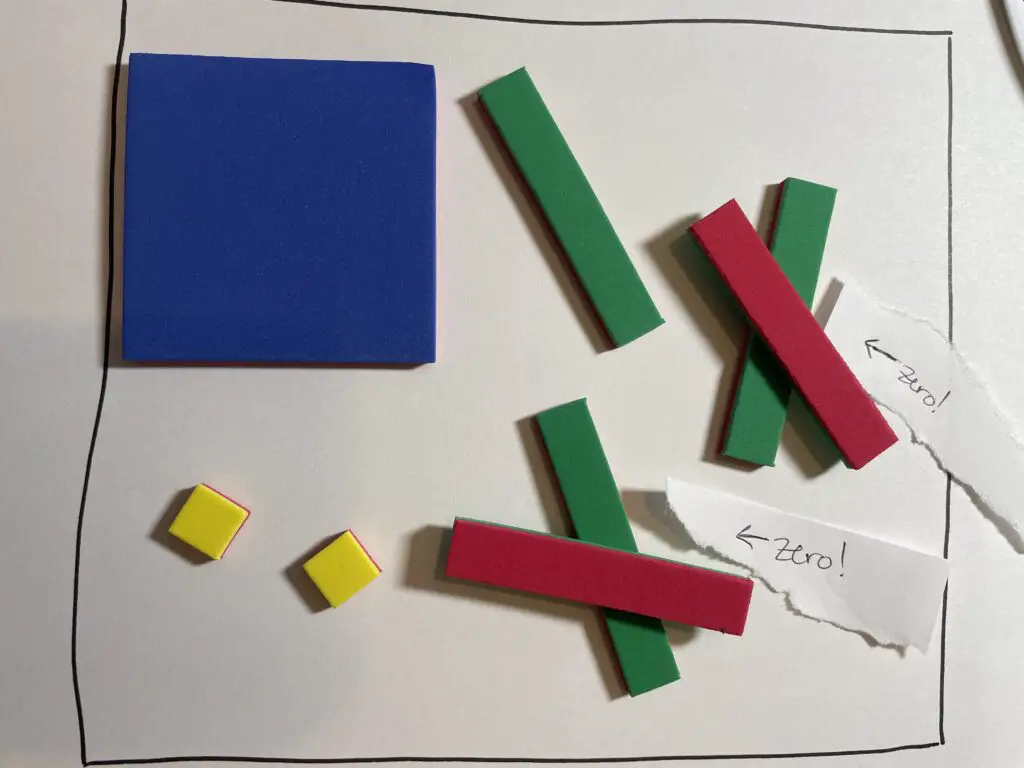
Use Zero Pairs When Needed
Your algebra tiles, whether electronic or physical, will have some set of the same shapes but a different color. Most often, this color is red. If they are physical tiles, you may be able to flip the tile over to find the red side. This is the negative, or opposite, of each shape.
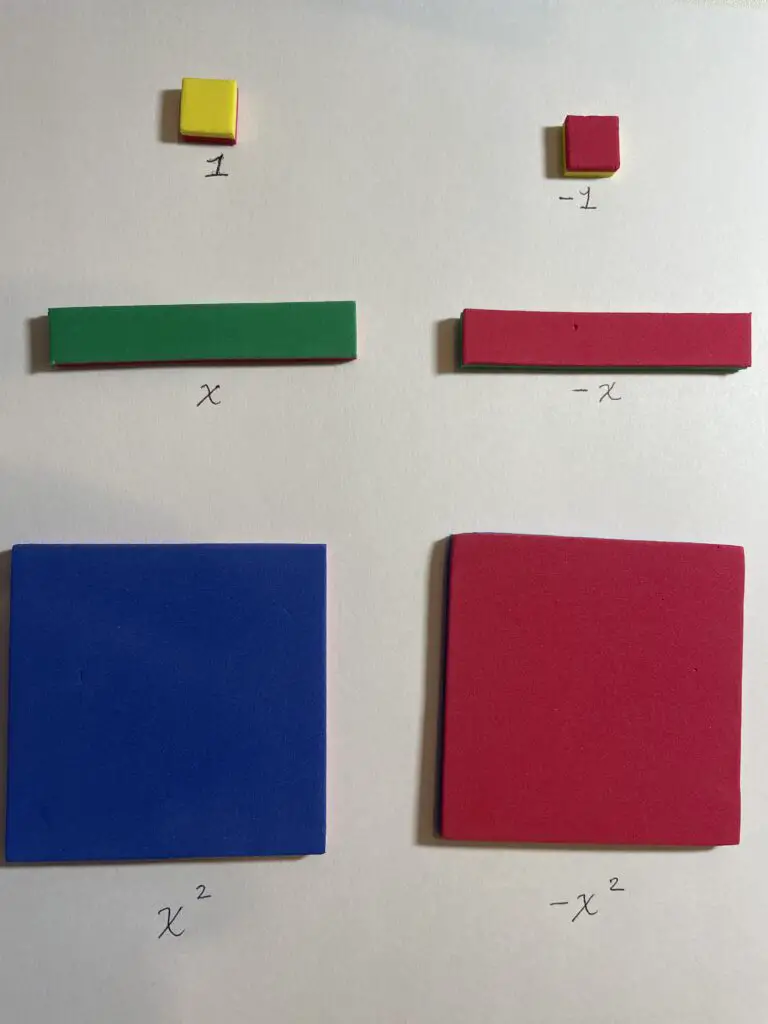
Zero pairs are made up of a tile and its opposite. They are called zero pairs because a number and its opposite always add to zero. We can use this fact to combine and simplify expressions, to subtract, and sometimes we may even introduce zero pairs into the problem to make things like factoring work. (That’s beyond the scope of this introduction, but is one way zero pairs are useful.)
Take Away or Add the Opposite to Subtract
Both interpretations of subtraction are available in algebra tiles. We can either take away, or remove, the appropriate number of tiles to perform the subtraction, or we can add the appropriate number of opposite tiles and find our zero pairs.
You’ve Got This!